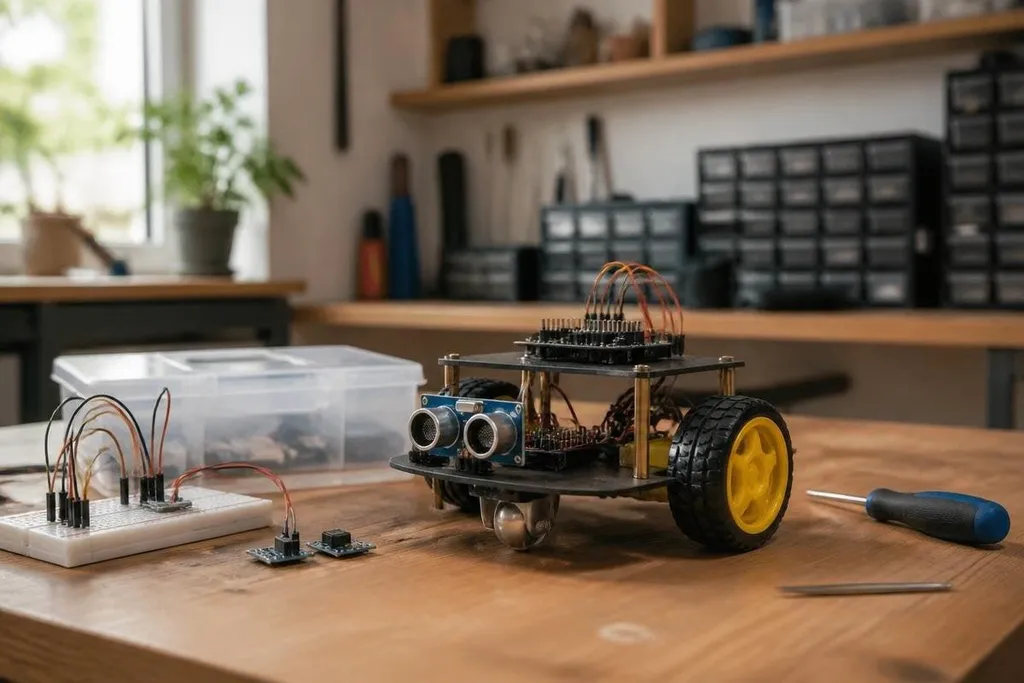
A DIY robot can begin as a wheeled base, a distance sensor, and a small control board. That modest setup teaches the parts that decide whether a robot moves as planned or spends the afternoon against a wall.
This guide is for the person building their first working robot at home, in a school lab, or in a small workshop. It explains why DIY robotics is growing, how the pieces fit together, and where a careful build should stop.
Quick read
- Start with one task, such as moving to a marked point
- Give the robot a clear way to sense walls, objects, or its own position
- Treat power, wiring, and safe movement as part of the design
Why DIY robotics is easier to enter
A robot needs four working parts: a structure, motors, sensors, and a controller. The controller reads sensor data and sends commands to the motors, while the structure keeps those parts in place.
That division lets a builder start small. A two-wheel robot can teach motor control and sensor readings before the build adds an arm, a camera, or a gripper. Each new part adds a task that can be tested on its own.
Open hardware also helps. Many DIY projects use boards that accept code from a computer and connect to common sensors through simple electrical interfaces. The exact board matters less at the start than knowing what voltage it needs and how much current the motors draw.
Power causes many early failures. A controller may restart when a motor starts because the battery or voltage regulator cannot supply the sudden current. The robot may appear to have a software fault, even though the problem sits in the wiring.
What a first build should teach
The best first project has a clear result. The robot may follow a line, avoid a wall, or move between marked points. A clear result gives you a test that can pass or fail without a long debate.
Start with open-loop control. In this mode, the robot sends a motor command without checking whether the wheel reached the expected speed. It can move, but small changes in battery power, floor grip, or motor load will change the result.
Closed-loop control adds feedback. An encoder measures wheel rotation, and the controller uses that reading to adjust the motor command. With that feedback, it can keep a closer speed or distance, though the wiring and code become harder to check.
This is where DIY robotics turns from assembly into engineering. A part can work on its own and still fail after it joins the rest of the system.
A home robot may lift a small load on the bench, then lose position when its battery voltage drops or its frame flexes. Reports at Robot24 give you named machines and test results to compare with your build before the next section looks at limits that home projects can’t easily remove.
The limits of home-built robots
A small robot can show a working idea without proving that the idea is ready for a busy workplace. Indoor floors may be flat, lighting may stay steady, and the builder may be close enough to stop the machine by hand.
Safety needs its own design work. Motors need a physical power switch, moving parts need room to stop, and software should have a clear response when a sensor gives an impossible reading.
A robot that behaves well during a short test can still act badly after a loose wire or low battery changes the input.
Cameras also add work. The robot must process images, deal with changing light, and decide which parts of a scene matter. A distance sensor can be easier for a first navigation task because it returns a simpler measurement.
I’d keep the first build small until the robot can repeat one task without a person correcting it.
A build checklist
Use this list before adding another motor, sensor, or software feature:
- Name the task: write the action the robot must complete and the point where it should stop.
- Map the power: check the battery voltage, motor current, regulator rating, and ground connections.
- Test each part: read one sensor, run one motor, and check the emergency stop before joining them.
- Set a safe speed: begin with slow movement and enough space for the robot to stop.
- Log failures: record the battery state, surface, sensor reading, and code change after each failed run.
A build that passes these checks gives you a sound base for a camera, arm, or remote link. Add one change at a time, because a robot with five new faults gives you no useful clue about the first one.
The rise of DIY robotics will be measured by working machines, not by parts scattered across a bench. Build the smallest robot that can prove one task, then let its failures decide what comes next.